

Are you a beginner to Open Source?
Doesn’t have an idea for the buzz words PR, issue, commit, push, pull if so check this blog and learn how to contribute to an open source.
What is an Open Source?
An Open source is a platform where many people from all over the world work on a project. When a project is open source, anybody is free to use, study, change, and distribute your project for any purpose. E.g. Linux is an Open source.
Why Open Source?
Contributing to open source can be an awarding way to learn, teach, and build experience in any domain.
Why people contribute to an Open Source project?
Earn experience
Brush up existing skills
Get to work on real-world projects
Meet various people and collaborate
Help, teach, and learn together
How to publish an issue ?
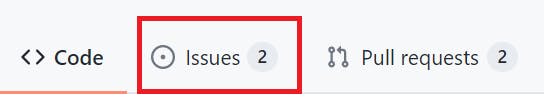 By clicking the issue you will be navigated to the page where you can see a button called new issue
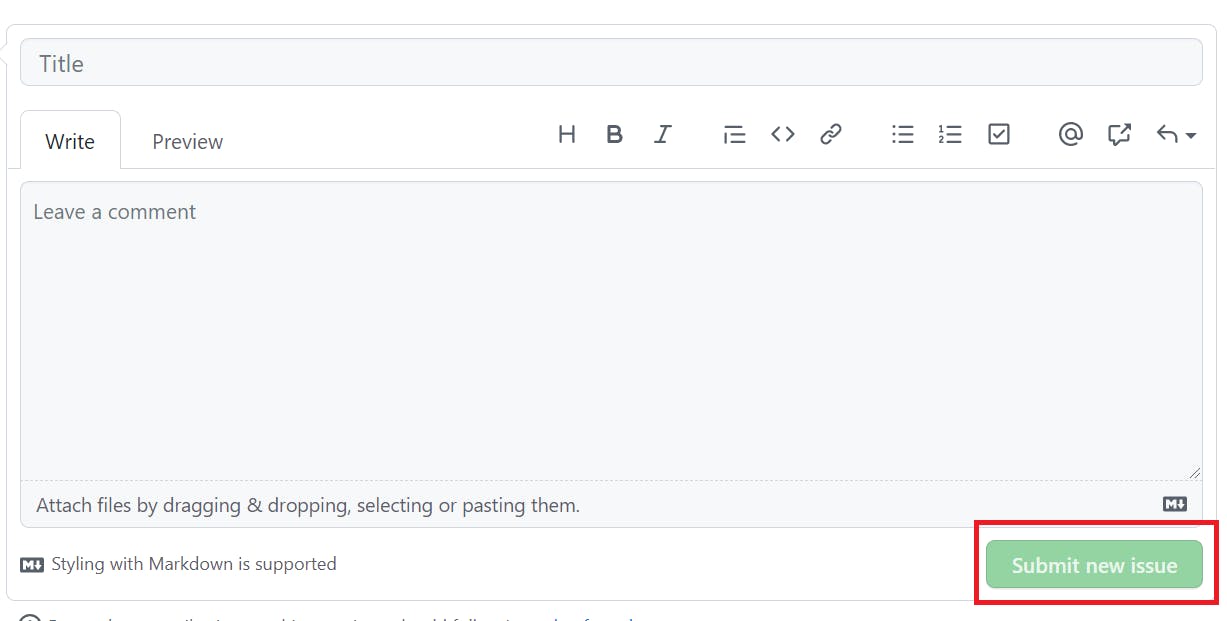
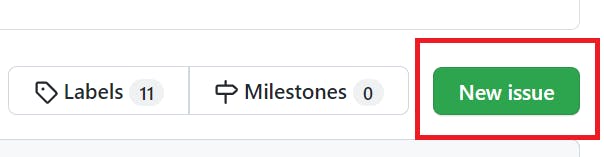 Click the New issue you will be navigated to a comment box at that box, comment what you like to change in the repository and submit the issue, once they accept the issue given by you they will assign you to contribute to the project.
Contribution:
Now after they assign, you can start contribute check the following work flow to complete your first contribution. 👇🏻
Step 1:
Haven’t you installed Git? Install now.
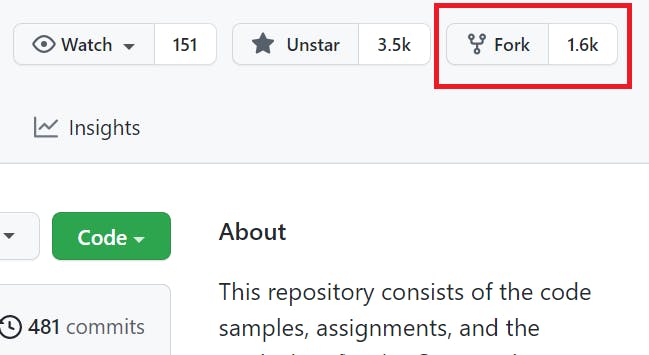
Step2: Fork this repository
It is done by clicking on the fork button on the top right of the page. This will create a new copy of this repository in your account.
Step3: Clone repository
You can clone the repository by clicking the drop down button and copy the URL
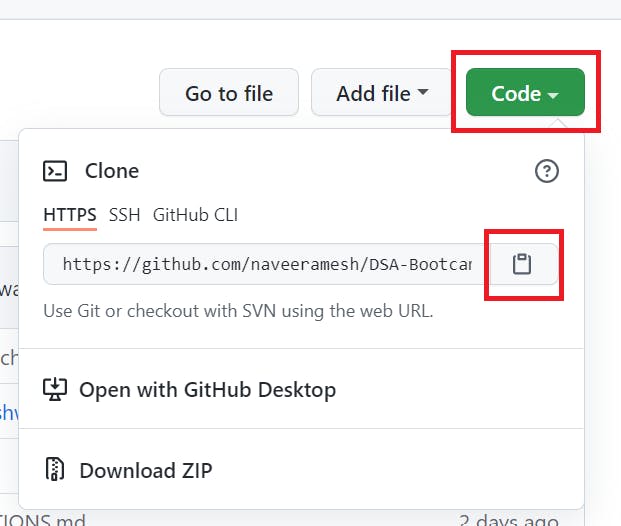
git clone "copied url"
For e.g.
git clone "https://github.com/naveeramesh/DSA-Bootcamp-Java.git"
Here, DSA-Bootcamp is the name of the original repository now it is locally cloned to your device.
Step 3: Create branch
Now, you have to create your own branch, At the very first step move to your cloned folder
cd DSA-Bootcamp-Java
The DSA-Bootcamp-Java is your folder name. Now create a branch using the git checkout command:
git checkout -b add "branch name"
E.g.
git checkout -b new_branch
Here the new branch is the name of the branch you can give any name it is up to you.
Step 4: Commit
Now, you can make necessary changes, e.g. You can create a folder called Blog/README.md and insert some text, code and save the file, Now move back to the terminal and give the command
git status
Now, it list out the changes you have made.
git add .
This command helps to add all the changes you have made
git commit -m "first commit"
This command helps you to commit all the changes you have made to the file, It is not necessary you should name is as first commit you can also name it as
git commit -m "new_branch - readme"
The new branch represents your branch name and readme is the name of your file.
Step 5: Push Changes
Until now the changes have not added to the GitHub repository,
git push -u origin <add-your-branch-name>
E.g.
git push -u origin new_branch
Step 6: Submit your changes for review
This is the step where you inform the owner of the repo to accept the changes, which is called PR - Pull request, After pushing the changes move to your cloned repo and refresh the page
 Click the compare and pull request and you'll be moving to the comment section
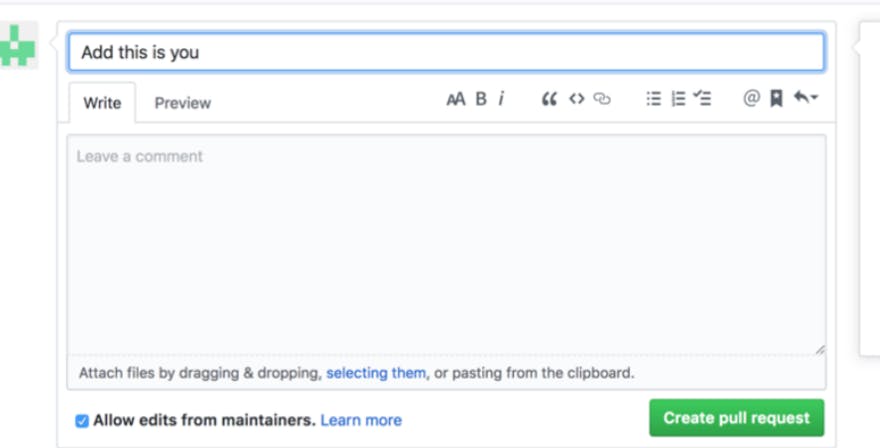 Now comment your changes e.g. I had fixed the readme file and click the create a pull request.
Soon when the owner merging all your changes into the master or main branch of the project. You will get a notification email once the changes have been merged.
Now comment your changes e.g. I had fixed the readme file and click the create a pull request.
Soon when the owner merging all your changes into the master or main branch of the project. You will get a notification email once the changes have been merged.
Bravo! You completed the standard workflow issue ->fork -> clone -> edit -> pull request, Now you can start contributing to open source projects.